Showing posts with label digital art. Show all posts

Sunday, September 18, 2016

Mixing Digital and Physical + A Sketchbook Page


Today the art I focused on doing was a lot more oriented towards drawing and not so much painting, but I suppose the first piece could technically be considered mixed media.

This is definitely one of my favorite things I've finished in a good long while, and I'm happy that I even managed to come up with the concept in the first place. It's definitely something I'm going to have to explore in the future. I scanned the page from my art journal I painted yesterday into my computer to start things off.

A big thing I wanted to do was make this painting feel more finished, so I opened the scan in Photoshop and used my drawing tablet to add solid black outlines. I love the way this turned out, and the lines from the composition paper showing through add a sort of subtle touch that I love.


The second thing I have to share with you all today was a age that I finished in my sketchbook (you can see the marker lines peeking through on the opposite page from this sketch) that I absolutely adore.

When I started this page, the only real idea I had in mind was the girl in the lower left hand of the page. I didn't even realize that I was going to give her a body (which is why the one side of her body is sort of falling off of the page), but I'm glad that I did in the long run. She's a character that I'd love to give a final version eventually. 

After I had given her a little bit of work, I started to develop other concepts and felt the need to put them down as well. After it was all said and done, an hour and a half had passed and this was the result. Sometimes a little bit of pointless sketching is great stress relief, and this was one of those instances.

In the long run, today was more of a time to recover from working four days with long hours in a row. I watched a couple of movies and got nice and inspired in that regard, and the ideas are slowly but surely starting to merge and work themselves out. 

Thank you all for joining me, and I hope you're all as excited to see what the next couple of days (that I have off) will hold!

Saturday, September 10, 2016

Step-By-Step Digital Face (9.10.2016)

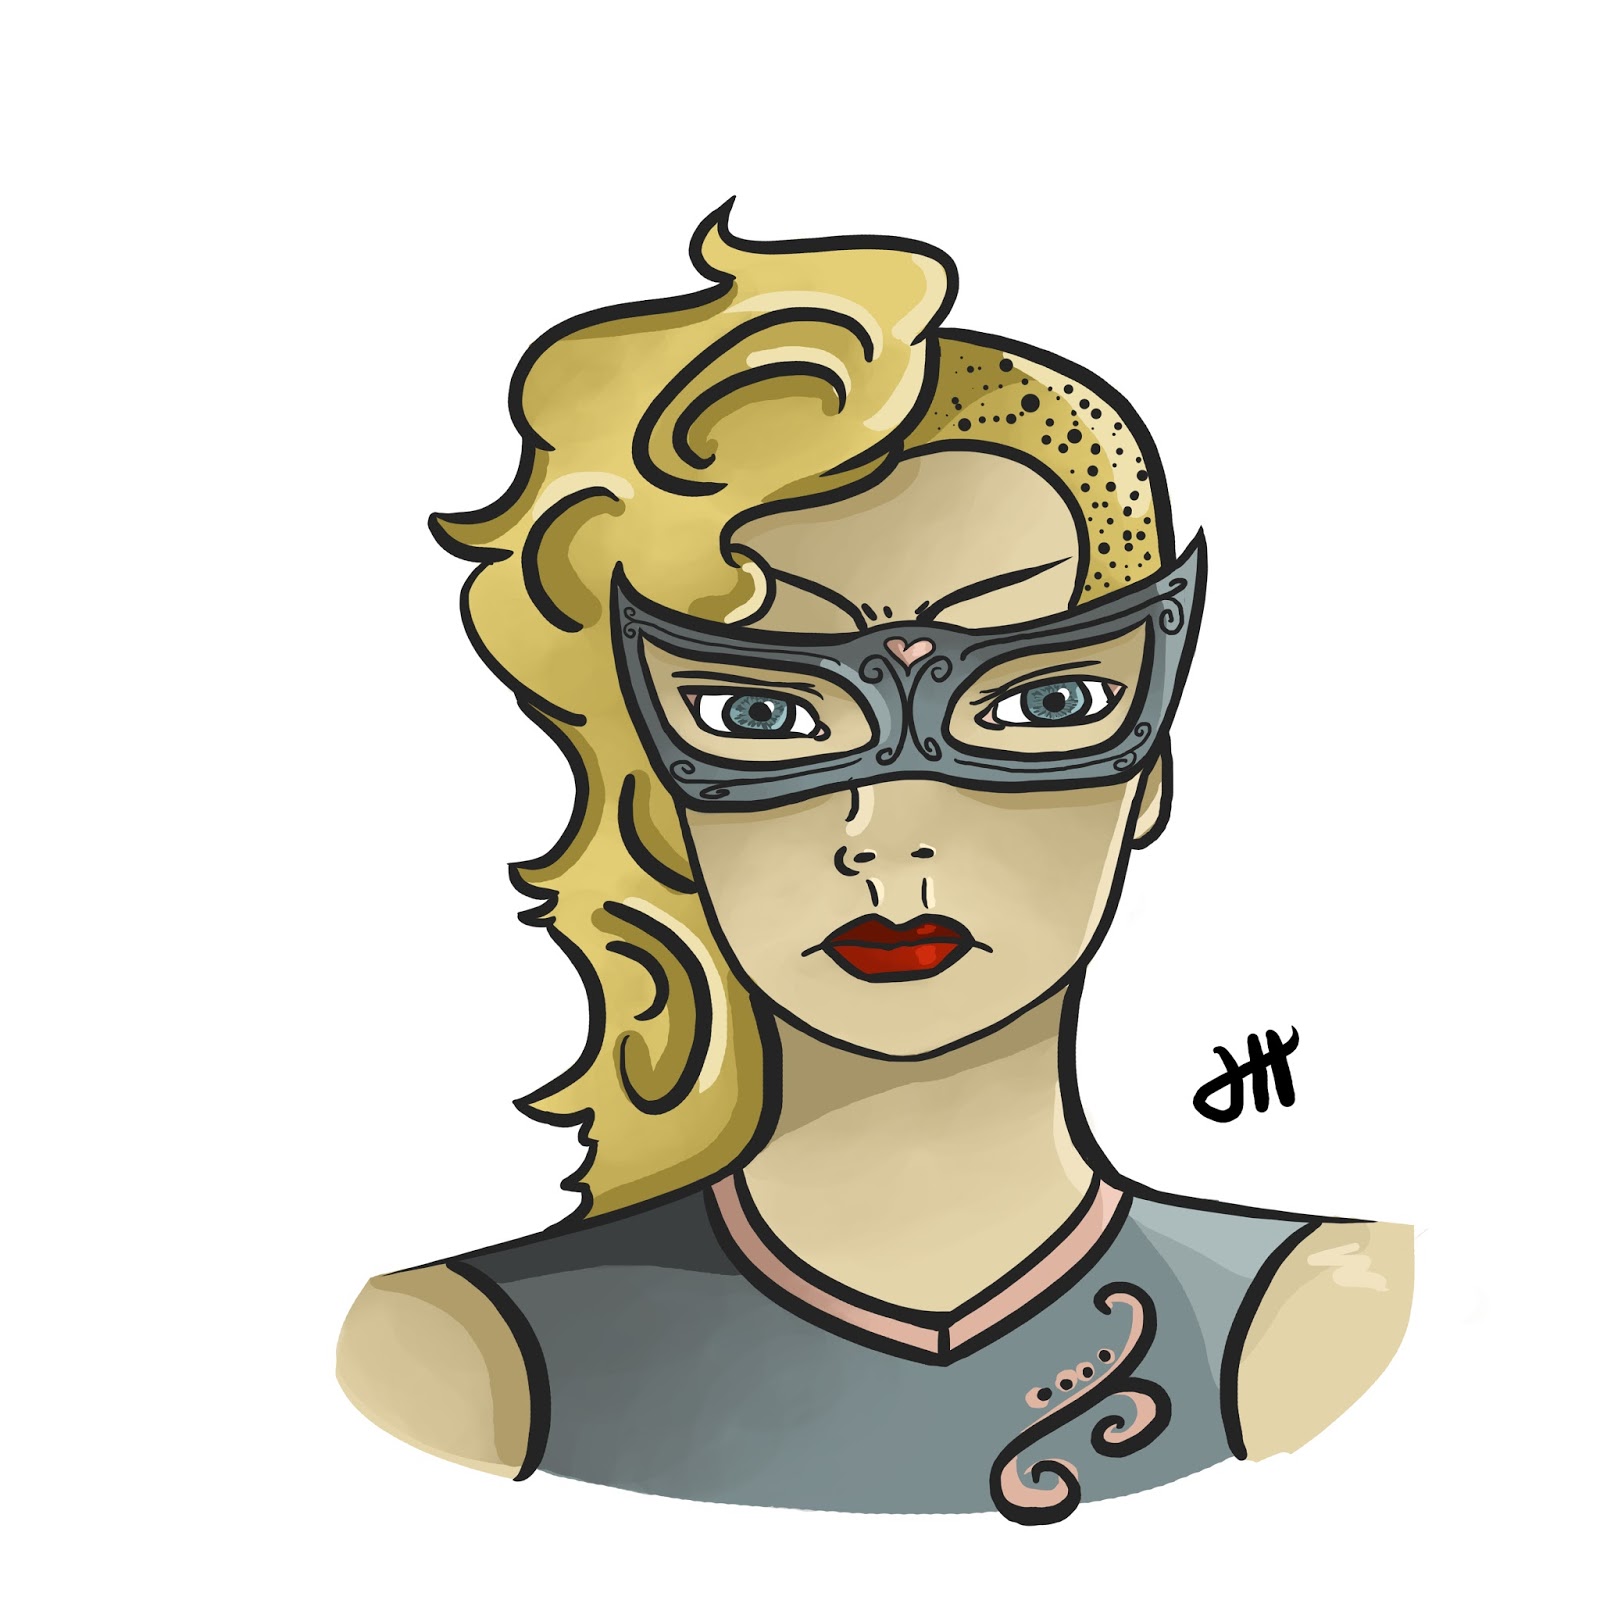
I haven't gotten around to doing any mixed media yet today (not that I won't later tonight), so I decided that I'd take a bit of a different approach to today's face for my 29 Faces. Today I made the decision that I wanted to do a bit of digital work in Photoshop, since I haven't used it in a little over a week, and I felt the urge starting to grow. 

I've also mentioned a couple of times that I was interested in doing some digital art for this challenge, and I finally found the time to do as I've been threatening! This piece in particular was done in Photoshop and took 2 hours and 20 minutes.

As you can probably guess if you've been following my 29 Faces journey, this face in particular was inspired by one of the first faces I drew for this challenge. I've been wanting to draw her digitally ever since that sketch appeared in my sketchbook, so I'm happy I was finally able to get around to it. She's always felt very superhero-esque to me, so I went for somewhat of a comic book style with this piece.

Now here's the kicker. Ever since I've started this challenge, I've never done a step-by-step or behind the scenes of any kind. However, I figured now was about the time to do so. I love the progression of digital art and the way it looks, so I typically take progress shots anyways. I figured I'd actually share them this time around.
  • As with most pieces of art, my digital art always starts with a rough sketch. This isn't perfect in any sense of the word, and it's solely intended to get ideas down onto the canvas. I typically work my digital sketches in layers, starting with a soft brush to work in large shapes, then I lower the opacity and start a new layer. 
  • On said new layer, I use a smaller soft brush to further define the sketch. This process of lightening the opacity and starting new layers continues until I move to a hard round brush, and the steps continue until I am happy enough with the layout of the sketch to start a serious outline.


  • The "serious outline" is what is depicted in the above screenshot. Essentially, I start a new layer, much as before. However, instead of being so rough and sketchy with the lines, I define them more - they are going to be my final lines, so I want them to look nice. 
  • I used to take a long time on the final outline layer, but I would get so caught up in making sure it was perfect that my pieces could take up to eight hours to complete. Now, I still can take that long to complete a piece, but those are typically full body pieces complete with backgrounds and sometimes several characters.
  • I like Photoshop's "Hard Round" brush for my final sketch because it gives a nice line variation in the thickness, but stays solid in color.


  •  The next step forward is to do a flat color. This is exactly what it sounds like, and it's fairly straightforward. At this stage in the process I don't worry at all about shading or a light source, or anything of the kind. Instead, this step is purely about making sure the color scheme I've chosen works well.
  • It's basically a coloring page at this point - I use a brush to work underneath of the outline layer, filling in color as I see fit. Here I am just making sure that everything works well together, as an overall whole. 
  • In order to avoid becoming repetitive (you can scroll up to the top to see the finished piece again) I've decided to show a photo of the finished piece printed out to show the final steps. I think it looks really nice like this. 
  • The final step is to add shading and highlights. I typically will start with choosing a light source, then adding in darker shadows with a hard round brush. Then a blend it in with a large brush that changes opacity as you press lighter on your tablet. This will add subtle shadows and shading.
  • In the case of this piece, I was going for more of comic book feel, so in addition to that step I also added some harder shadows (most notably underneath of the neck and the mask, as well as in the hair).
  • The final step, and my favorite, is to add highlights. These are reflections from the light source, and it takes a bit of practice to get the placement right (I still have some issues a lot of the time), but they add a ton of dimension that I adore.
Please keep in mind that this is only my process for creating art in Photoshop, and it was due to a lot of continuous practice and evolving of style. However, that being said, if anyone has a drawing tablet laying around that they haven't gotten the nerve to use and you end up being inspired to do so because of this post, I'd love to hear from you!

You can also see this face in my portfolio on my website here.

Thank you all for visiting, and I hope that you enjoyed this post and face as much as I do!